Have you participated in an awesome Linky Party or Blog hop recently? Ever wonder how they manage to set up all that every week?!?
I know I sure did! The answer is simple…Inlinkz.com!
For today’s
I decided to do a walk through of Inlinkz.com and let you guys in on the secret of how easy it can be!
Curious? Then keep reading!
Sometimes we all need a quick step-by-step guide to help us get through something. It has pictures to show you each step?!? Even better!
Don’t need the full How To? Go straight to the part you need here:
Sign Up Link Up Tool Dashboard Create a Link Up Duration of Link Up Design of Link Up Notifications Templates Advanced Options Contests Voting Extra Input Dashboard After Creating Link Up View/Edit/Delete Links Add Your Links Thumbnails Adding Code To Site
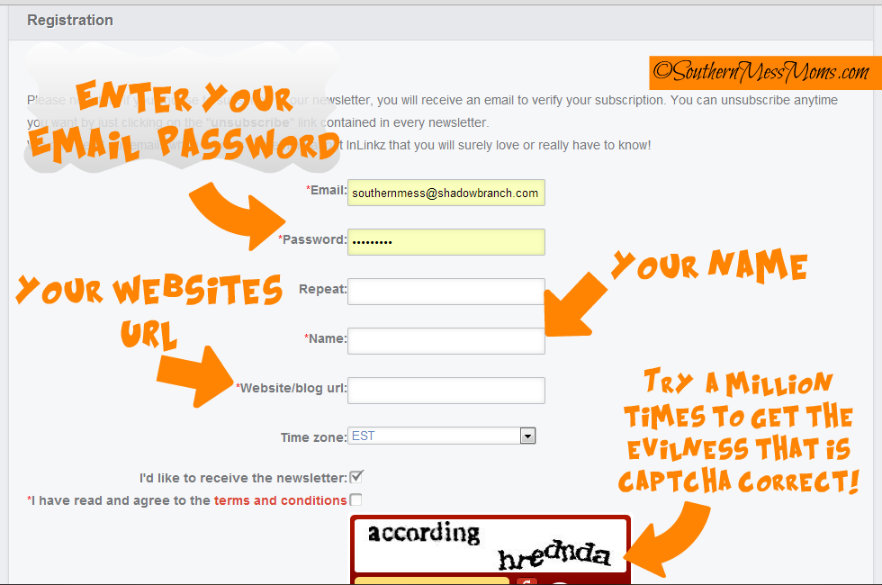
The very first thing you need to do is Sign Up with Inlinkz.com if you haven’t already. They have a free option and a really reasonable paid version. (I will point out the parts of this How To that are only available in the paid version.)

Fill in all the required blocks to sign up for a FREE account.
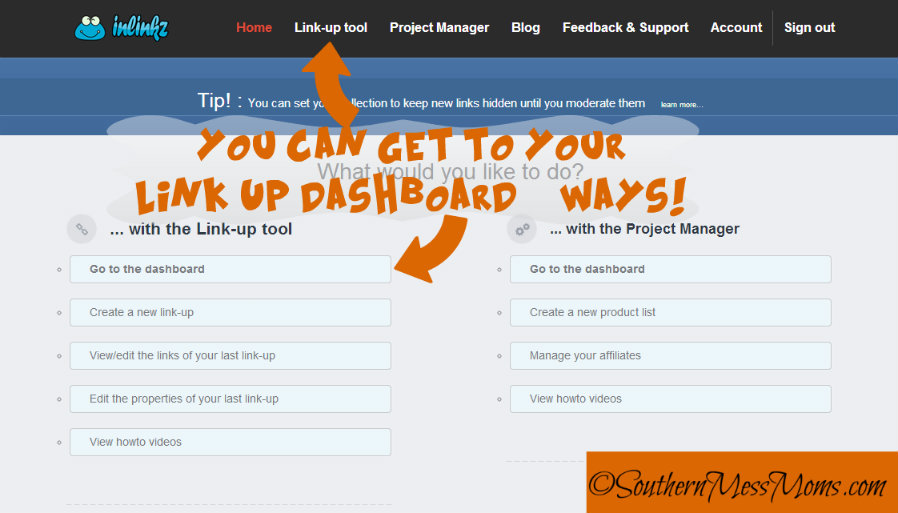
Once you are signed up and signed in, you need to go to your Link Up Tool Dashboard.
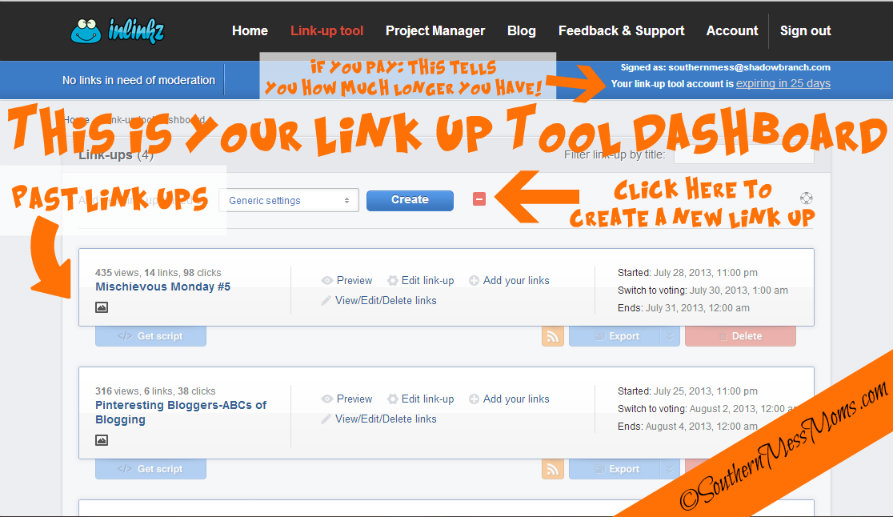
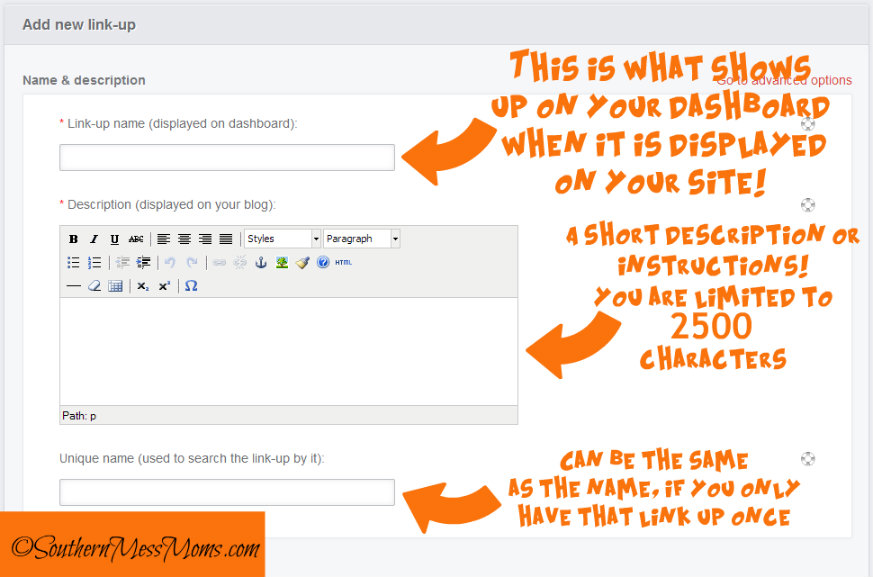
Once you click Create New, a new window will open for you to fill in the following information:
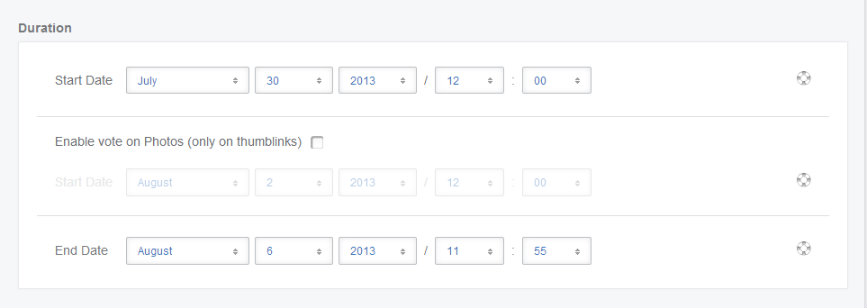
Duration:
Maybe I’m silly…maybe I just have no common sense (too true!) but I have a ton of trouble getting the time set up right! See those pretty little circles on the right side? Click on those for additional help! 🙂
The start date is when people will be able to begin adding links.
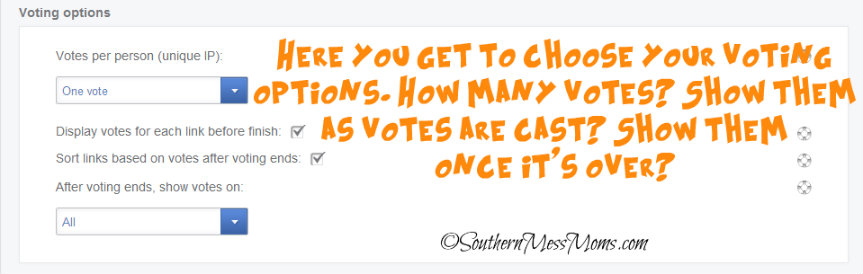
The Vote On button (a paid feature) would be set as the date and time you want people to STOP being able to enter new links. Only then will you be able to vote. (More info on voting a little further down.)
The End date is, well, the end date! This is when you want the link up to be completely over. (If you are doing voting this will be when you want voting to end.)
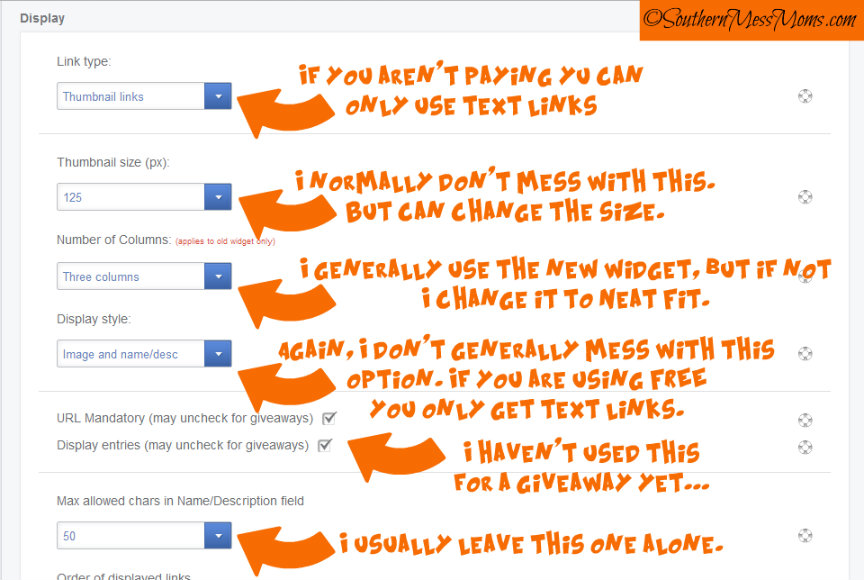
Now that you have the Duration set, it’s time to get into how your Link Up will look.
Okay soooo..Notifications!
The first few Link Ups I did, I clicked that little button that said Notify Me. Well…if your link ups get popular…that can end up being a TON OF EMAILS! So choose wisely! (You can go back and edit later and not have to change the link up code.)
I am still up in the air about allowing users to delete their own links. I have left it on so far and haven’t had an issue.

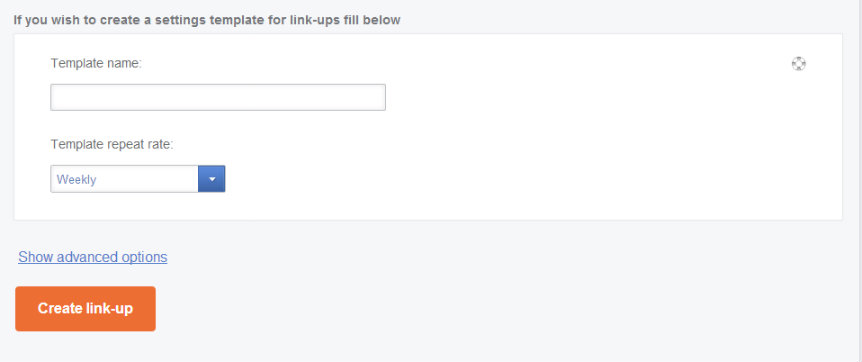
Lastly, you can name the Template.
This is how you could change your Link Up to a Meme (or reoccurring link up). You can choose to have it repeat weekly, every 2 weeks, on the nth day of the month, or on the 1st day of the month. I haven’t tried this yet. But I will add to this How to when I do! 🙂
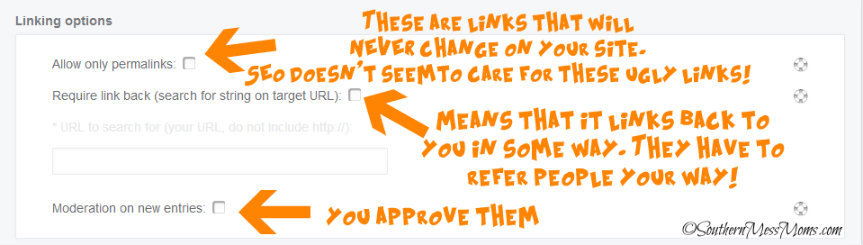
Now come the advanced options (these are paid features)
Permalinks: DO not go to the main site. Must link to the actual post (IE something that will not change.) SEO has issues with these sometimes because of all the “ugly” code.
Back Links: This makes it so that their link up will NOT go live until Inlinkz detects a link back to your site on the post they linked to. (nice feature for those of us who require adding the button or something.)
Moderation: Their links won’t go live until you approve it. (If you have spammy ones or people not following rules, this is a good feature.)
I love that you can do contests with this!
I am currently doing Pinteresting Bloggers using it (the winner for this week (7/26-8/2) will get a FREE month of ad space on 3 blogs!)
If you want the winner to be chosen by Vote…you can do votes and have it organize the entries by vote, then just notify the person with the most votes at the end of the contest. I am currently using the Random winner option.
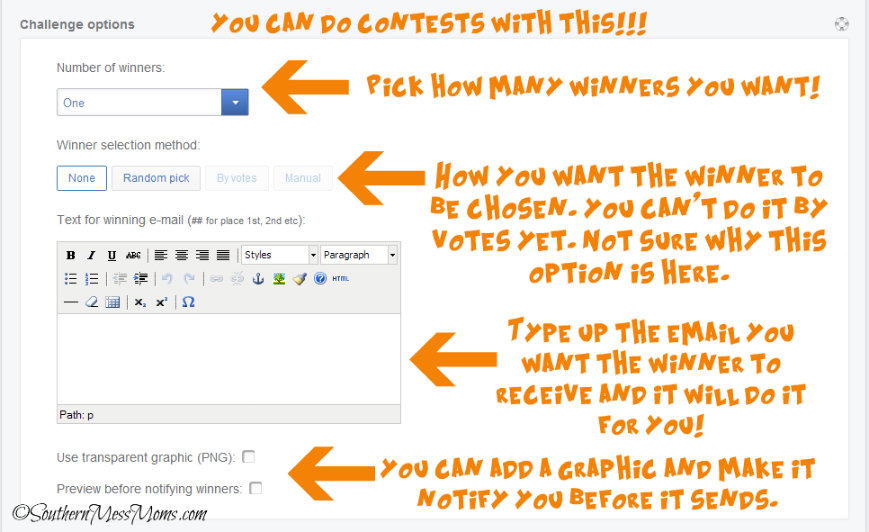
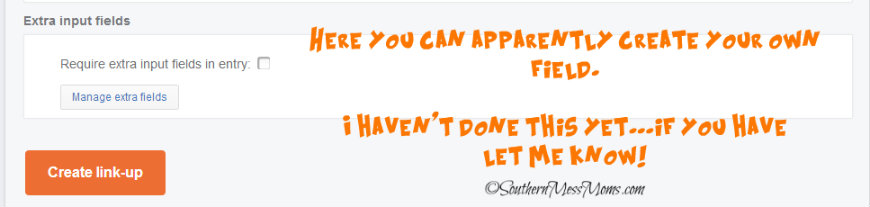
If you have used this please let me know so I can update it!
Now for what everything looks like after you create your Link up! (back to dashboard)
1. Title of Link Up, Number of times the link up was viewed, number of links added, total number of clicks on the links.
2. Get Script: If you have already created it and find some where else you want to post your link up, you can get the code here. This is also where you would go if you want to share the code with another site. (You will be able to choose from the old widget and the new, it has examples you can see of each.)
3.Preview: Duh! See what your link up looks like!
Edit Link-up: Need to make a change? Here is where you go! You DO NOT have to change the code on your page if you edit here!
Add Your Links: Want the host and co-hosts to show up before the linky goes live? (I always do), you can add them manually here. (Picture on how to do that in a few.)
View/Edit/Delete Links: Well…it is what it says…next is a picture of what this window looks like.
4. Below all of the dates you will see Export and Delete. Export gives you the option to download all the Links (emails, sites, etc), just the emails, or the Link Up itself. I use this feature with Mail Chimp (How To coming soon!) to send out friendly reminders to those that have participated in my link ups 🙂

If you click on View/Edit/Delete Links this is what you will see:
No. : What order people link up.
Thumb: What image they linked.
URL: What link they used.
Name/Desc: What name/description they entered (People usually use their site name or post name.).
Email: Their email address.
Clicks: How many times their link has been clicked.
Votes: How many votes they have gotten.
Date/Time: When they linked up.
Modify: Edit or Delete the link. (If they linked up to the wrong page, which happens A LOT, and you want to change it you can do that here…or you can just delete their link.)

If you click “Add Your Links” on the dashboard:
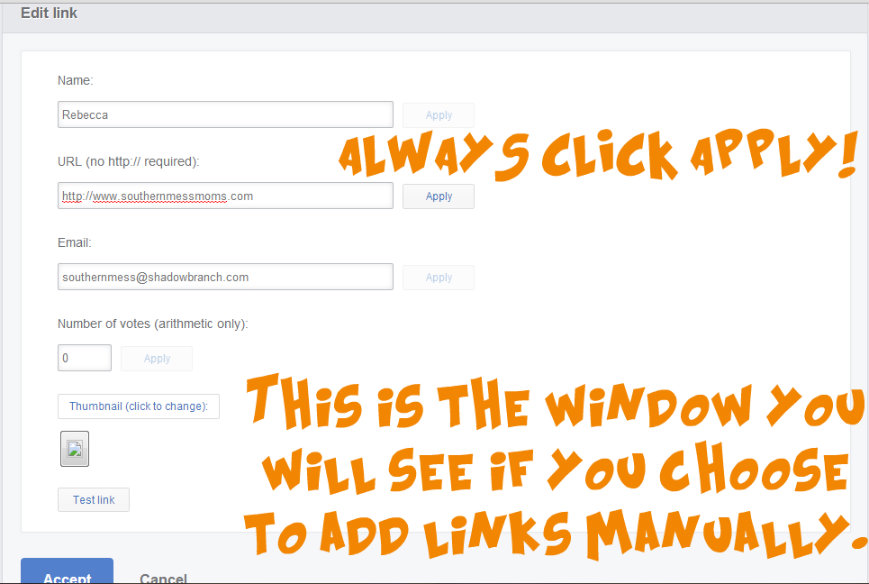
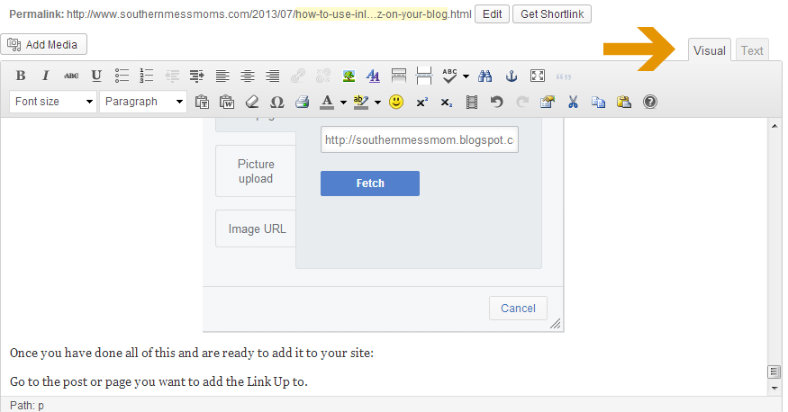
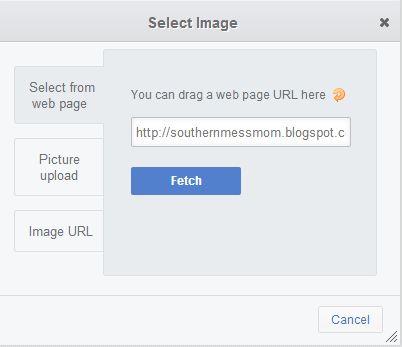
When you click on the Thumbnail button in the window above you get this:
You can: Select From Web Page (upload from somewhere online), Picture Upload (upload from your computer), or Image URL (like from photobucket.com)
Once you have done all of this and are ready to add it to your site:
Go to the post or page you want to add the Link Up to. Here is where things are a little different according to your Blogging Platform.
WordPress: You can copy the wordpress code get the Inlinkz plug-in and just add it anywhere or you can copy the code into the Text window. You should be able to preview it before you click publish.
Blogger: You will need to copy the code into the HTML part of your page/post. You will not be able to see it until you publish it.
Coding hint: If you want your giveaway or link up or anything to be centered you can add <center></center> to either side of it and it will center any code in between 🙂