
 For this weeks How To Tuesday, I decided it would be nice to show you guys how to use MailChimp.com!
If you have never heard of MailChimp…well where have you been?!?

WARNING: This is an in depth and lengthy How To. I have provided links to sections of the post so that if you are looking for certain information you can jump to it.
As a blogger/business MailChimp is a must have! I, myself, use it for many things on my blog:
Weekly Newsletter Sign Up Box for Emails Blog Hop/Linky Reminders Surveys Effectiveness of Emails
But before we can get into all of the wonderful things you can do with MailChimp, we have to figure out how to sign up and navigate the dashboard!
Want to jump to your favorite part? Here is your chance!
Sign Up Dashboard Create a Campaign MailChimp + Inlinkz Menu Run Through
It’s super simple! I promise! You probably will come out of this with most, if not all of your hair still in tact!
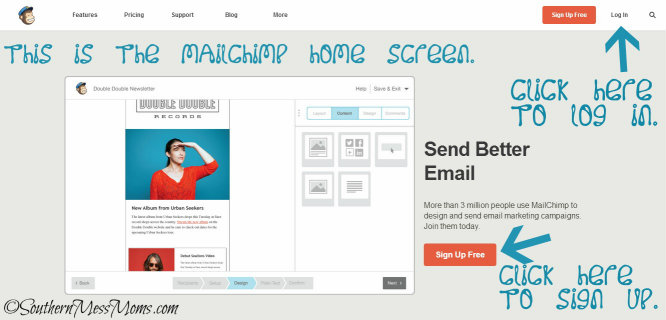
If you haven’t signed up yet, now is the time!
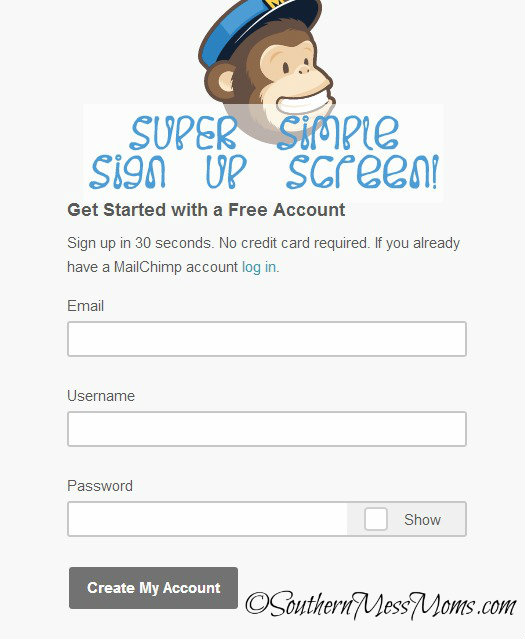
If you click on Sign Up, a super simple Sign Up screen appears! All you have to do is enter your Email, Username, and a Password! Click on Create My Account and you are in baby!
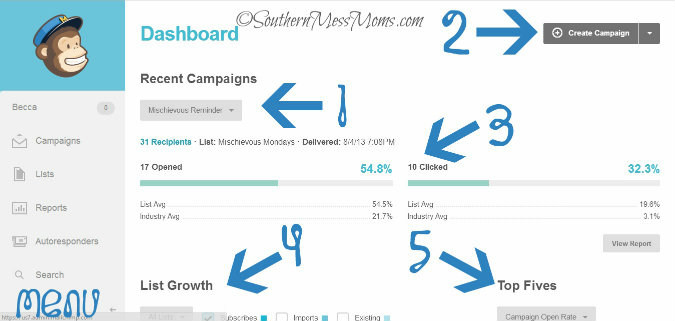
So once you have logged in you see this wonderful little Dashboard!
On the left you have your Menu (I will get to those in a minute).
1. Here you find a drop down menu that you can choose one of your campaigns (emails sent) to see a break down.
2. Click here if you want to create a new campaign. (I will get to that in a minute.)
3. This area shows you how many people this campaign was sent to, when it was sent, what percentage opened the email and what percentage clicked on a link within the email.
4. If you have your list set up where people can Subscribe to it, this area will show you how your growth looks over time.
5. Shows you which of your campaigns are the most popular. You can choose to sort by Open Rate, Clicks, or clicked links.
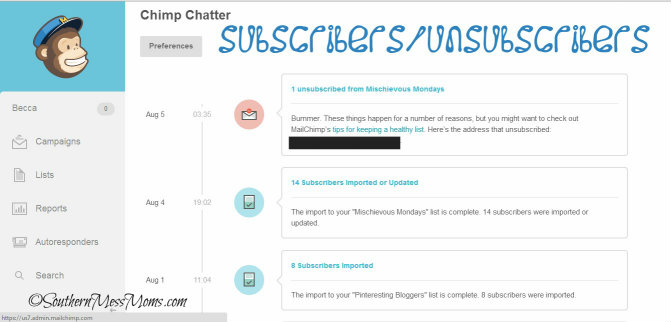
This awesome part of the Dashboard is available if you scroll down. Basically what you are seeing is how many people (and who they are under that little black box) unsubscribe from your email list! This is important to know and learn what emails make people unsubscribe! MailChimp even offers some tips and tricks if you click on the link in that box.

If you click on the Preferences tab at the top of the window you get this. Here you can change what you see on your Chimp Chatter. I am still figuring out Mailchimp and all of it’s possibilities…so bare with me!
Okay, now for Creating a Campaign:
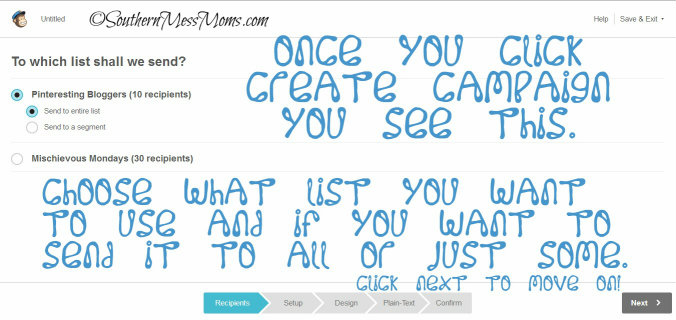
I love how proper MailChimp is….To which list shall we send? Hehe Southern translation: Who you want us to send this junk to?
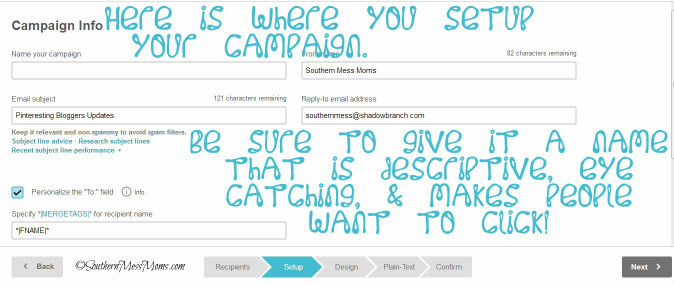
I don’t usually mess with anything that they auto fill here. I just fill in the Name and click next.
If you scroll down there are a few more options in setup.
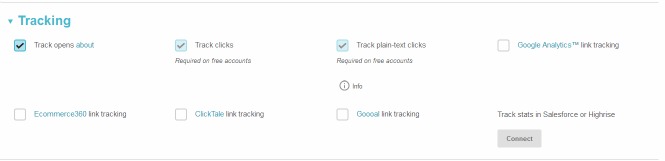 Here you get to choose what you want tracked from the email. I haven’t really played around with these features yet….
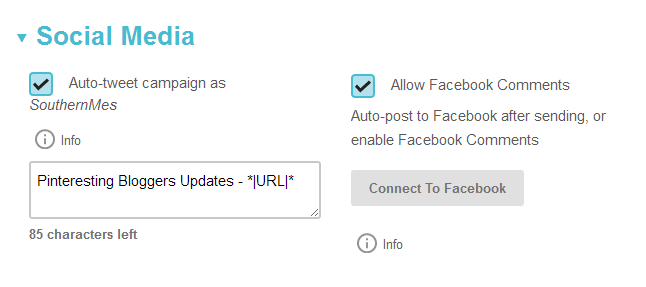 This is how the social media tab looks if you have not connected to something. Next I am showing you what you will see if you have (which I recommend).
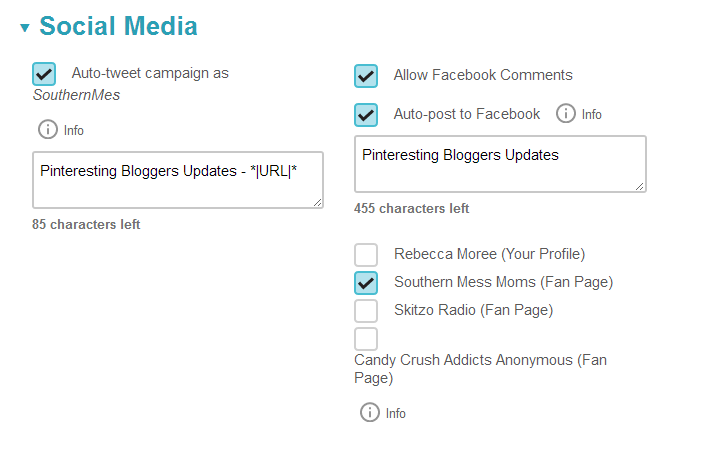
By connecting your social accounts (right now they only have Twitter and Facebook) you can automatically share a link to this with your followers! This gives your followers yet another opportunity to subscribe to your email updates! Always a good thing!
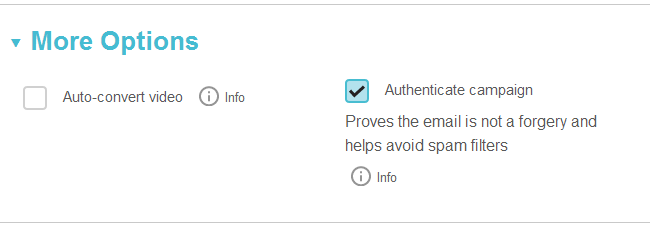
Last you have the More Options…which I have not touched! lol
Now for the fun part! Designing your email!! You have a TON of options here!
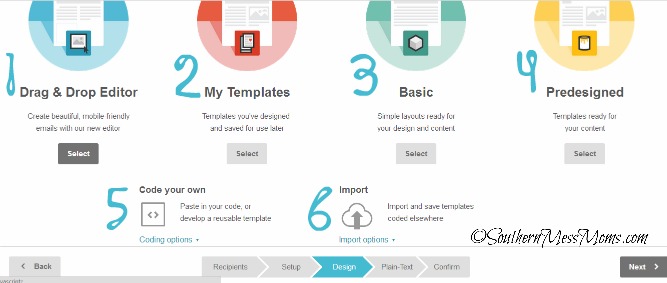
1. Drag & Drop Editor: Think you can’t do a nice looking email? Click here! This option makes it SUPER SIMPLE…Like dummy proof! (You can find old campaign designs that you have used here as well) This is generally the option I go with.
2. My Templates: If you have created and saved a template click here to find it!
3. Basic: Simple layouts that are ready for you to design and add content to.
4. Pre-designed: Duh! These are templates that are pretty much ready to go with little to no effort on your part.
5. Code your own: Feeling cocky? Think you can completely code your own template! Give it a try here…(Let’s just say I laughed at myself for even trying this!)
6. Upload a Template: Found a cool template online that you want to use? Upload it here!
Okay, so let’s go with Drag & Drop.
If you click on My Campaigns, it will show you a list and preview of all campaigns you have used in the past.
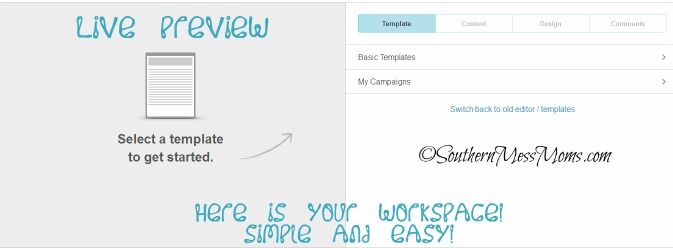
Click on Basic Templates.
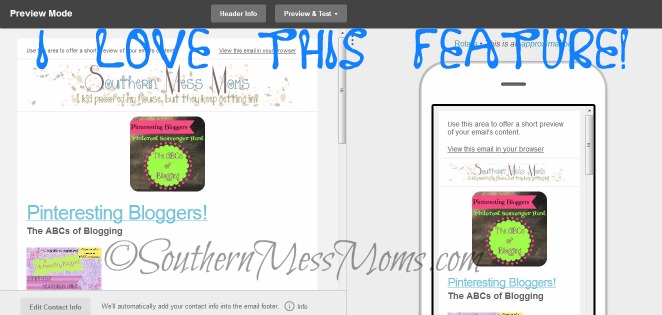
 I love that it lets me see it in computer and mobile form!
Let’s select 1 column banded.
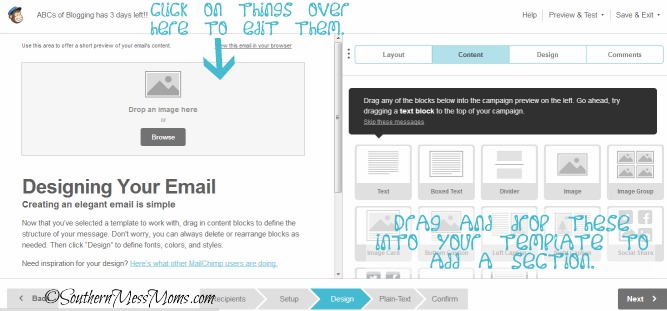
Here is what it looks like if you click on the sections on the left to edit them.
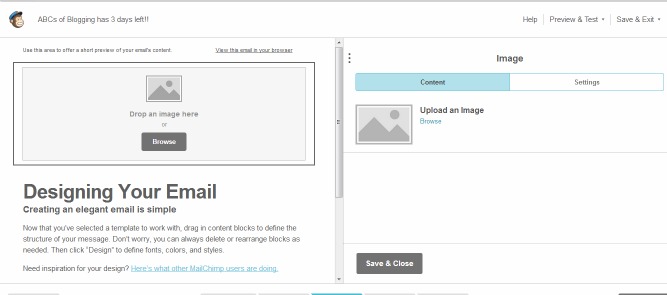
Upload an image. Make sure it is eye catching but fits with your email in some way!
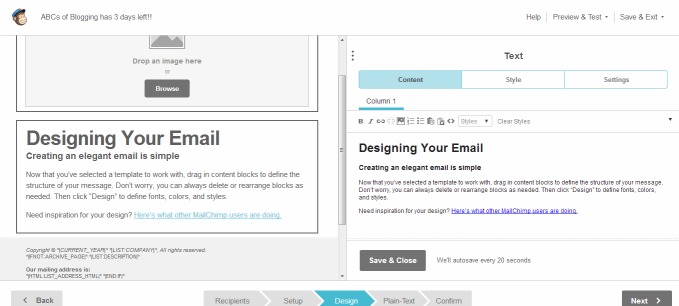
This is the main portion of your email. Be sure to spell check and all that good stuff. I recommend putting in a link or two back to your site to try and drive traffic back to you =)
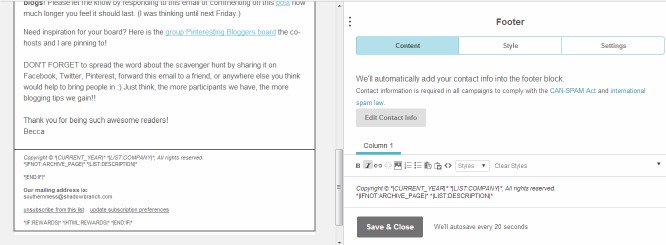
Okay, it could just be me..but this part is important to change. If you don’t, it will send your actual address out at the bottom of the email! I so didn’t want that, so I change it to my email address.
Just keep editing and playing around with your email until you have it looking and sounding the way that you want.
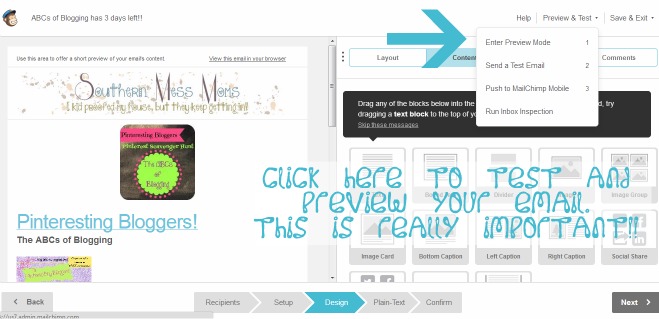
Preview/Test looks like this:
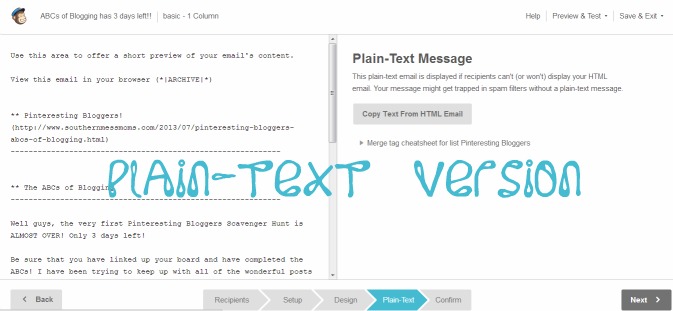
Click on next to check out the Plain-Text version of your email.
Click Next to confirm that your email is ready to send.
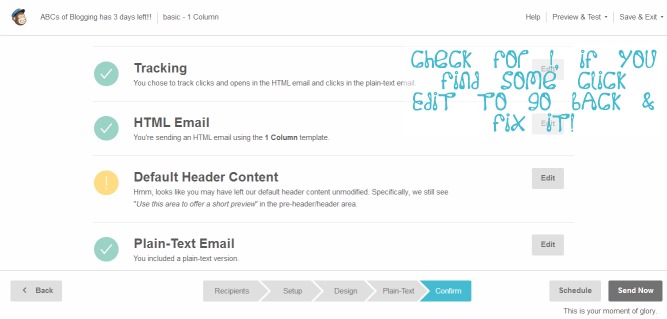
See, it says that I forgot to delete a section that I didn’t want to use. I can either go back and change it to something my own, delete it, or send my email as is (which would be a bad idea lol).
Once you have made any changes you need to make…CLICK SEND NOW! Cross your fingers and pray that people like your email!
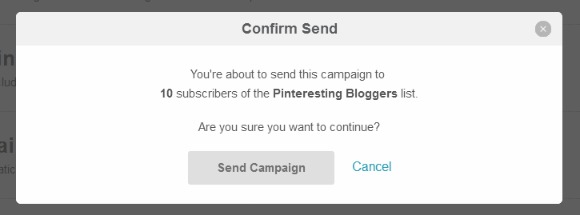
It even gives you one more chance to back out! lol Click Send Campaign!
Now for a Quick run through of the menu.
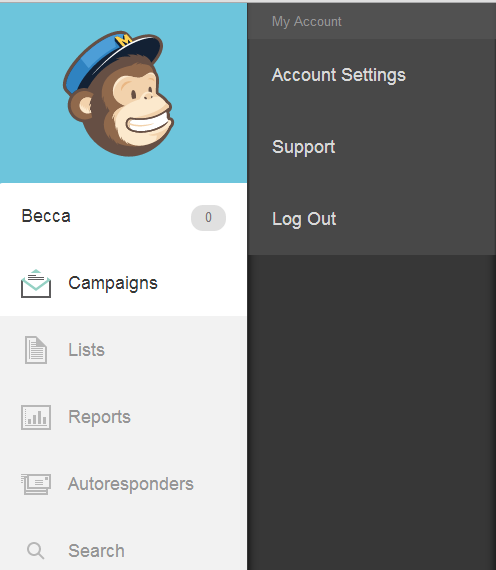
If you click on your name in the menu, you are given the option to change you Settings, get Support, or Log Out.
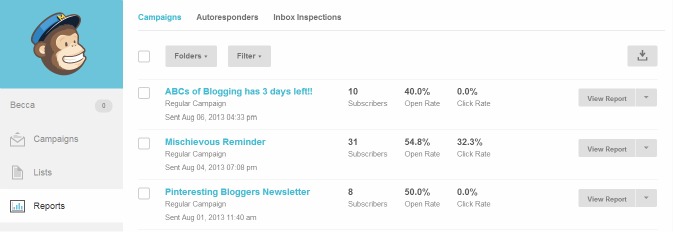
Campaigns:
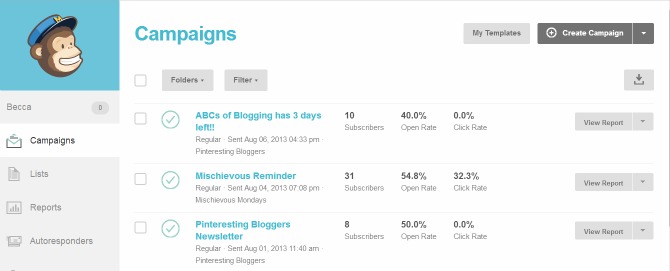
Gives you a run through of your campaigns, subscribers, open rate, click rate, and the option to view a report.
Lists:
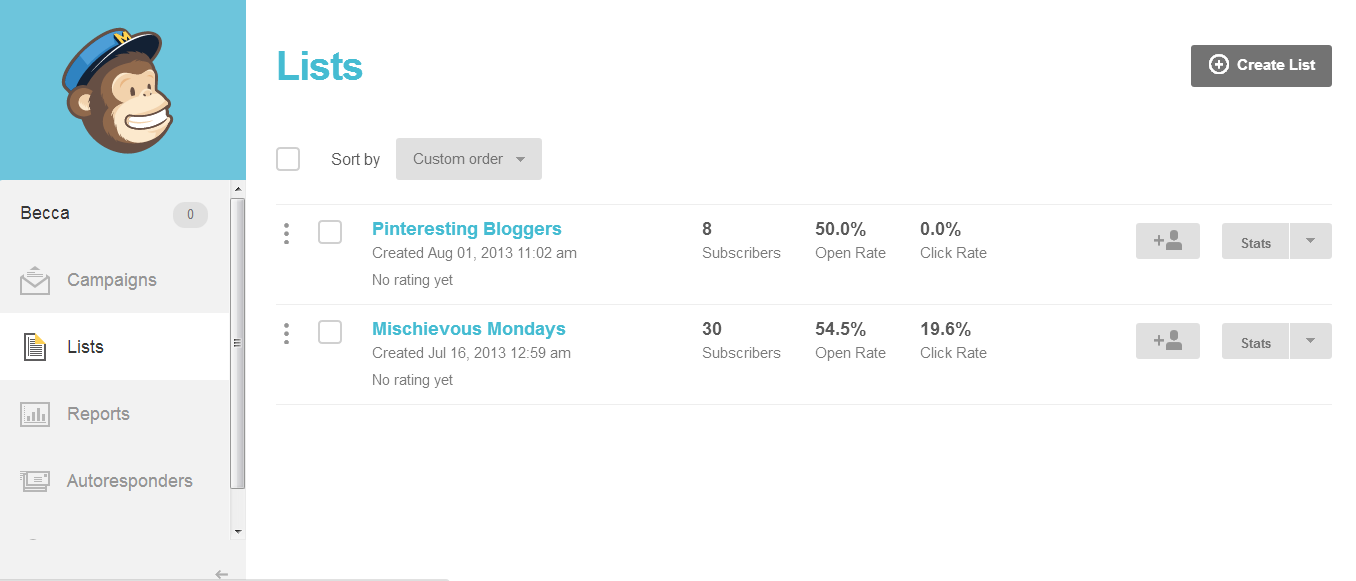
Here you can see all of your email lists and their details. (Very similar to your campaigns. Campaigns are emails you have sent and lists are the email addresses they are sent to.)
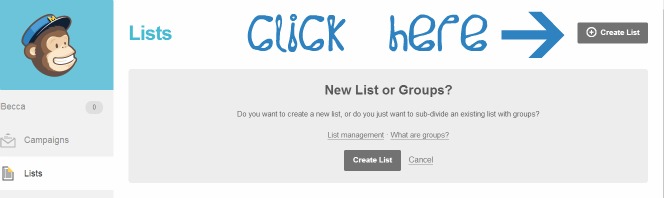
To create a new list:
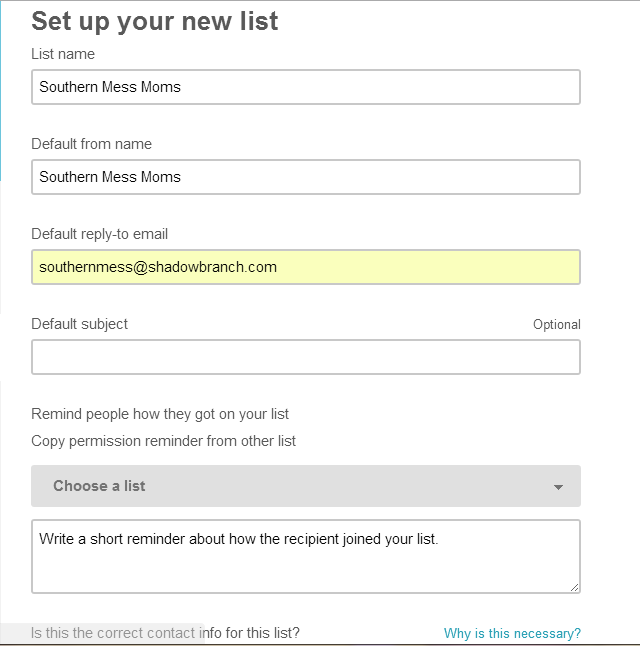
Be sure to fill in ALL of your information.It is VERY important that you remind people why they are getting this email.

TIP: IF you put in your address here it will show up at the bottom of your emails! I always put my email address in instead.
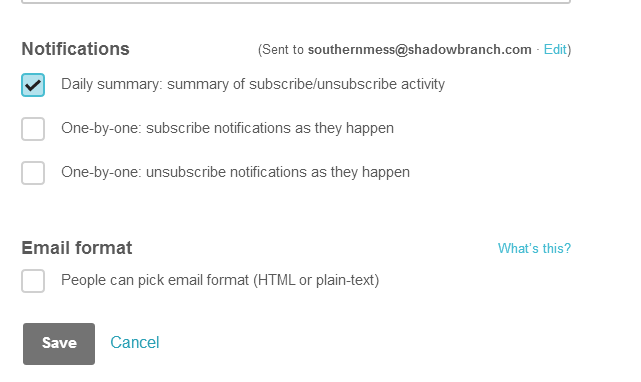
Once you are done, simply click Save.
Reports:
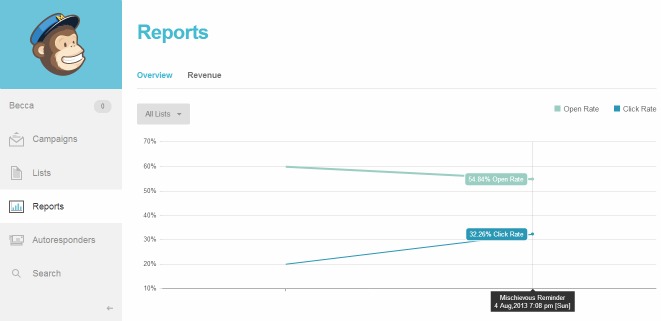
You can change up what this graph shows using the drop down menu.
A break down of your individual emails sent out and their productiveness.
Auto-responders:
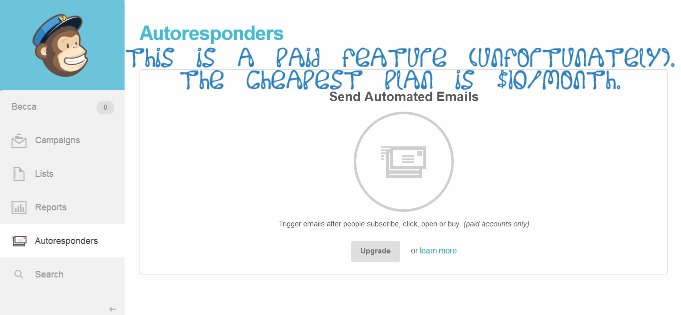
The fact that this is a pay only feature makes me cry =( I would really love to use this feature but am NOT paying $10 a month for it right now.
Then you have your search menu. This one is pretty self explanatory and I don’t think it needs a picture.
Part 2 of this series will cover what you have all been waiting for! Adding a SUBSCRIPTION box to your website!!